Accessibility
Format Headings Styles in Microsoft Word
Last modified 11/3/2023
Properly formatted headings help organize, improve searching capabilities in your documents, and save you lots of time. Microsoft Word offers several formatted headings to use. You can change these default styles to suit your document’s design. Follow these instructions to add, update, or modify text and heading styles in Microsoft Word.
Select a heading style.
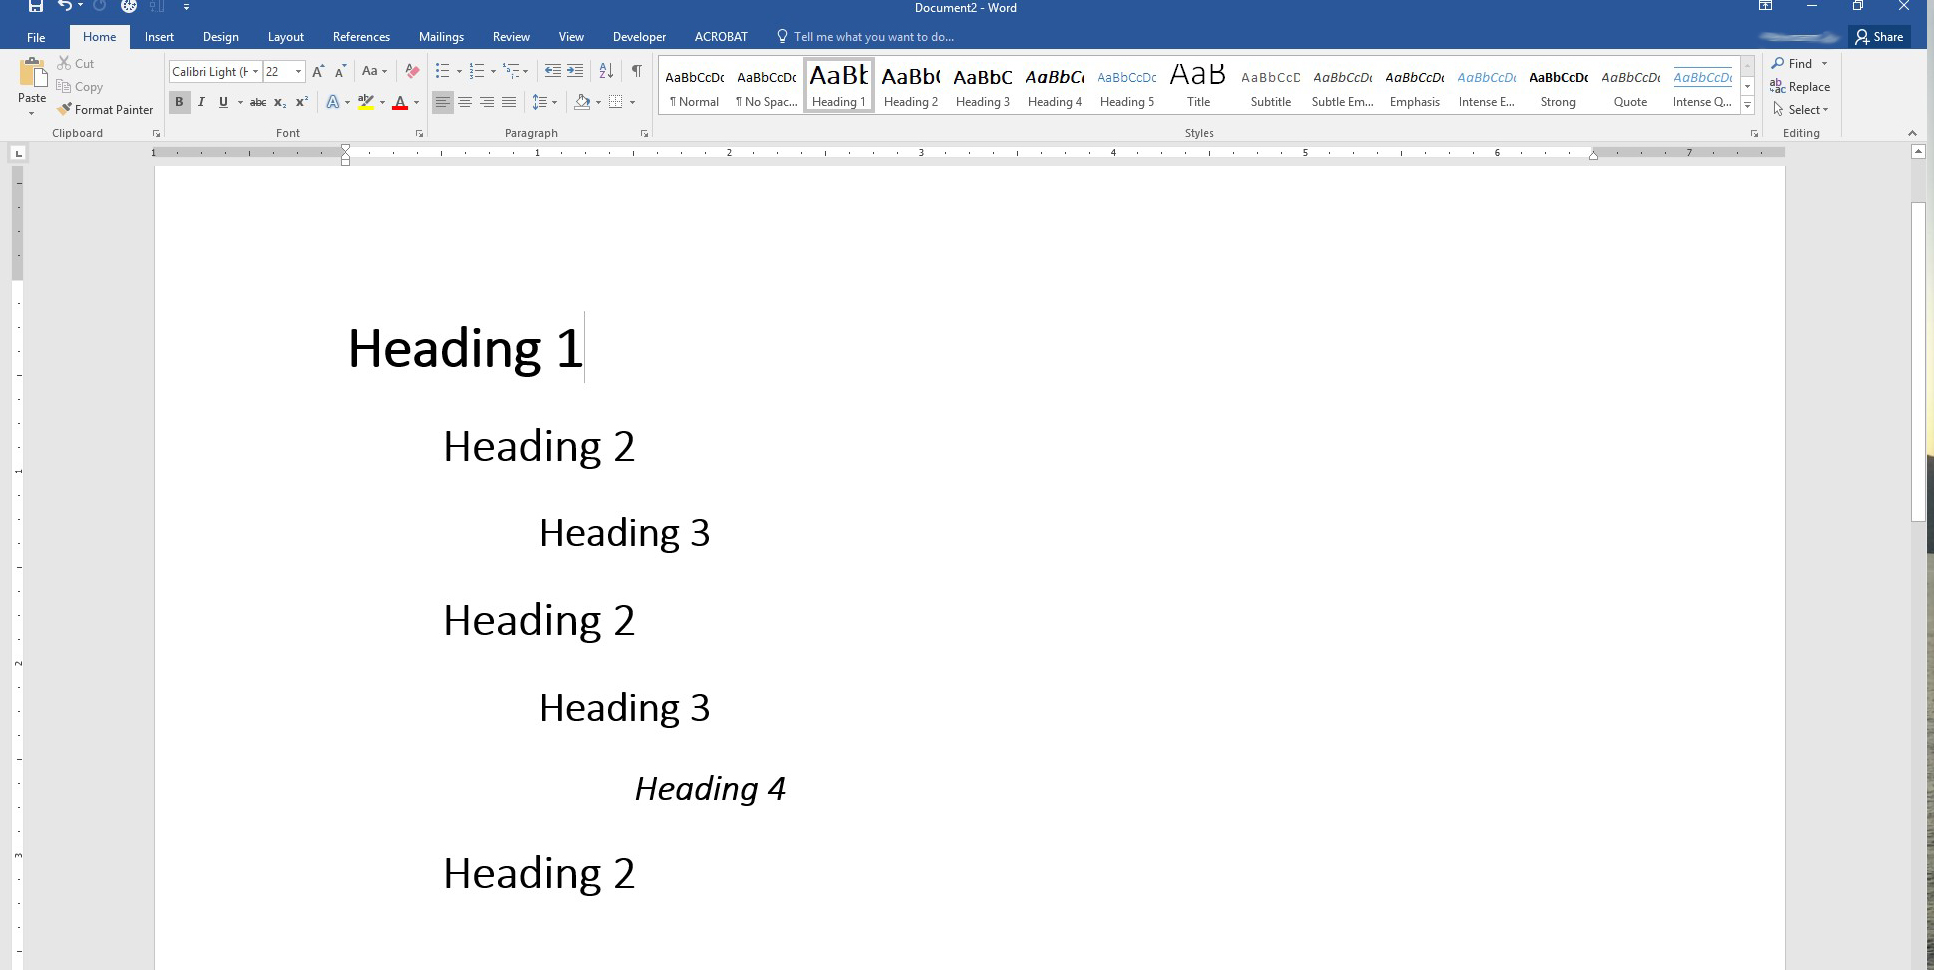
The heading styles are located in the Styles Gallery on the Home Tab. Place the cursor in the line of text you want styled as a heading. Choose the appropriate heading style from the Styles Gallery to change the format.
Note: if you hover over each style, the text where your cursor is placed will change to match the style. Remember to organize your headings into nested levels.
Update a default style.
A default style may not match your document's design. These styles can be easily updated by modifying the default styles.
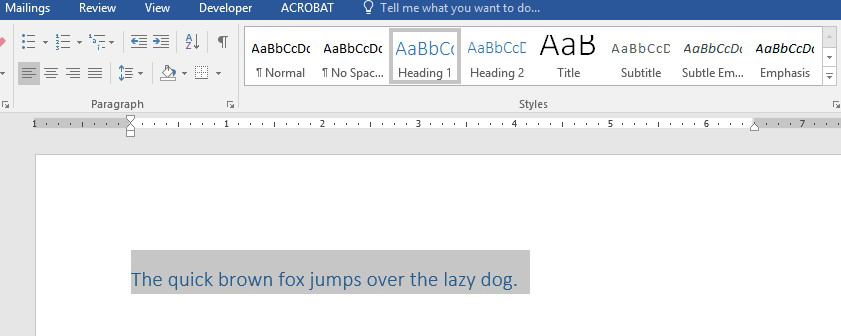
Step 1. Select text and choose a style.
To change the default style, select the text then choose a heading style from the Styles Gallery to format it. Remember, changing a default style will update all text formatted with that style. So, if you change the font for your Heading 2 style, all Heading 2 text will change immediately.
Step 2. Make style changes.
Make any font, size, and style changes from the tools offered in the Home Tab.
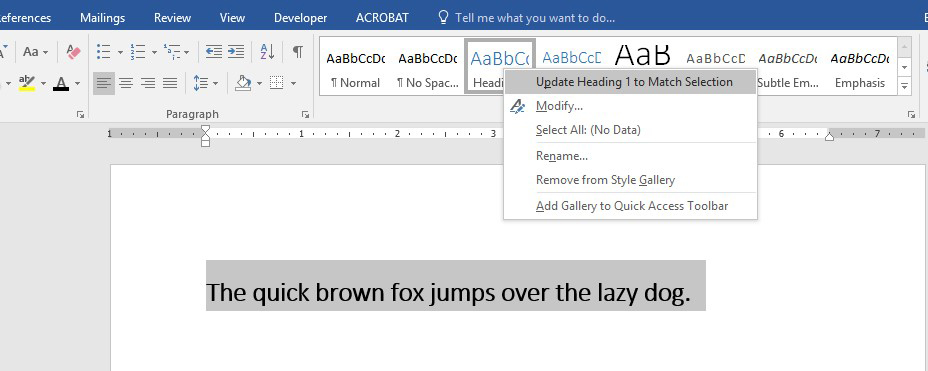
Step 3. Update to match selection.
Once the heading is styled, right click on the selected style in the Styles Gallery, and choose “Update Heading # to Match Selection” from the menu.
Modify Default Style
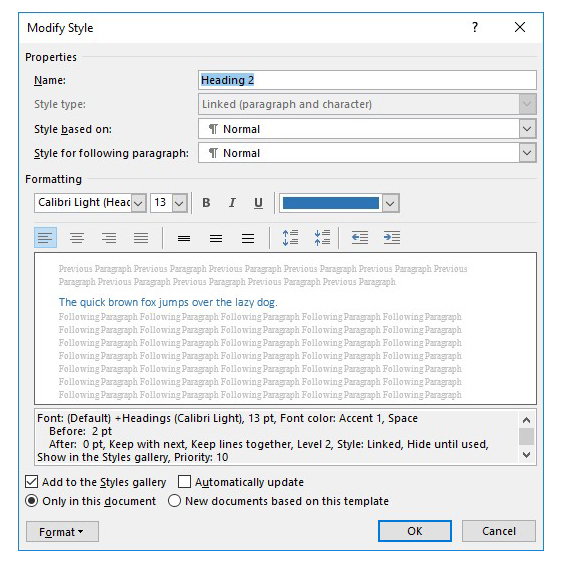
Another way to make changes to a default style is to make changes in the Modify Styles Menu.
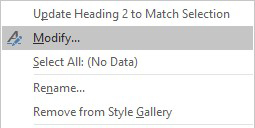
Step 1. Select Modify.
Right click on the style in the Styles Gallery and select Modify from the menu.
Step 2. Make changes to style.
In the Modify Styles menu, make changes to font, style, color, and spacing all in one place. To save changes, select OK.
Note: You may save your changes to "only this document" or allow changes to be made to all new documents by checking the appropriate radio button in the Modify Styles dialogue box.
Adding Styles to Style Gallery
If your Styles Gallery is not showing all heading styles (i.e. Headings 1-6) you can add them.
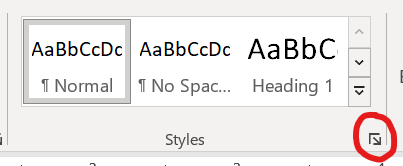
Step 1. Select Styles Dialog Box Launcher.
Select the icon in the bottom right corner of the Styles Gallery or use the key command Alt+Ctrl+Shift+S to preview, manage and customize the text styles.
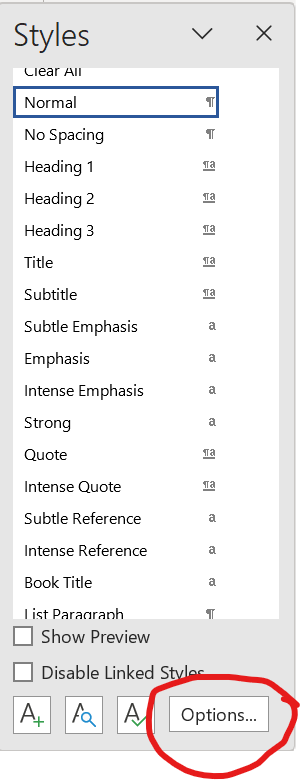
Step 2. Choose Options.
In the Styles Dialog Box, choose Options link from the bottom right corner.
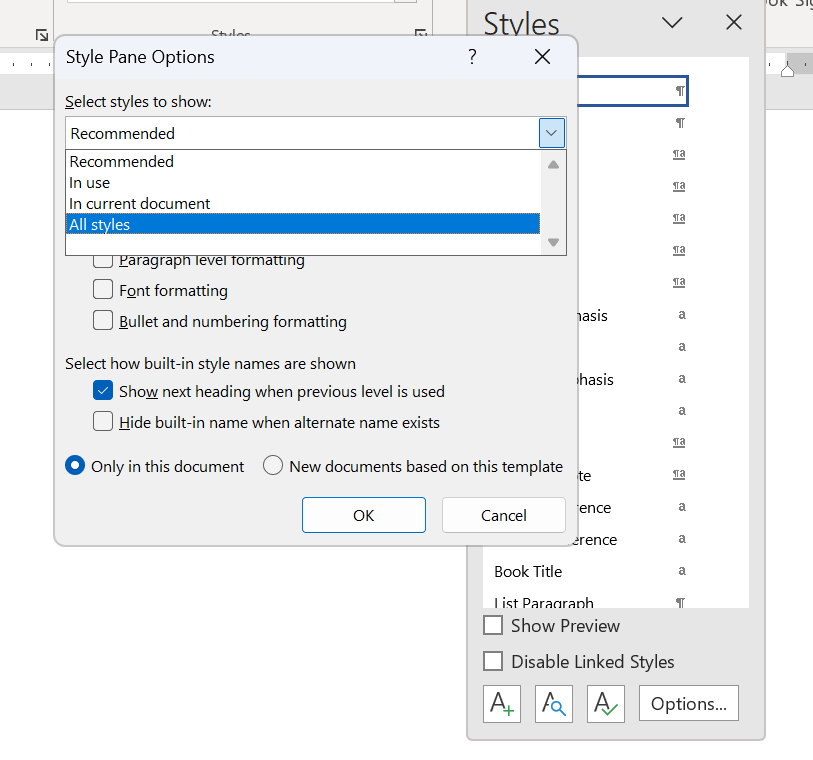
Step 3. Choose All Styles.
In the Style Pane Options dialog box, choose All Styles form the "Select styles to show" drop-down box. Choose either to update only this document or new documents based on this template then select OK. All style options will appear in the Styles Gallery.
